How to make a print file that goes to press without corrections
Ideas & tips · Print files
Preparing a print file: bleed, Canva, AI and binding
A file that looks good on screen is not yet a print file. A screen shows light and RGB colours, a press puts CMYK ink on paper, and a cutter trims the printed sheet to size. If the file has no bleed, the images are low resolution or the text sits too close to the edge, you only see it in the printed result.
This guide covers what a print file needs, how to make one in Canva, what AI is good for in design and what to avoid, and how to handle binding, foil and debossing. At the end there is a checklist to go through before you send the file.
How a file reaches the press
The press does not see your design as a picture. Before printing, the PDF goes through a raster image processor (RIP), which splits every page into four colour layers: cyan (C), magenta (M), yellow (Y) and black (K). Every point on each layer gets one value from 0 to 100%: how much of that colour goes there. The press puts it on paper as fine dots – the higher the percentage, the larger and denser the dots. Your eye blends the dots into one tone.
Bright red, for example, is C0 M100 Y100 K0: full magenta and yellow, no cyan or black at all. If the file contains an RGB colour, the RIP makes this conversion itself and the result may differ from what you saw on screen. If the file already has CMYK values, they go to the press exactly as the designer set them.
↑ Back to contentsBleed and safe area
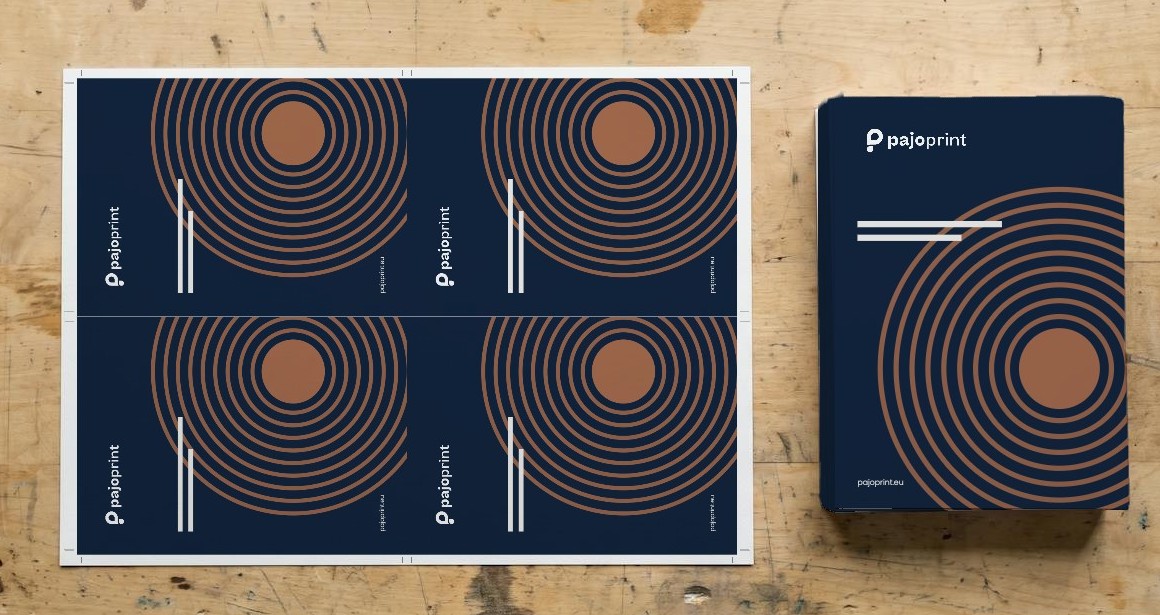
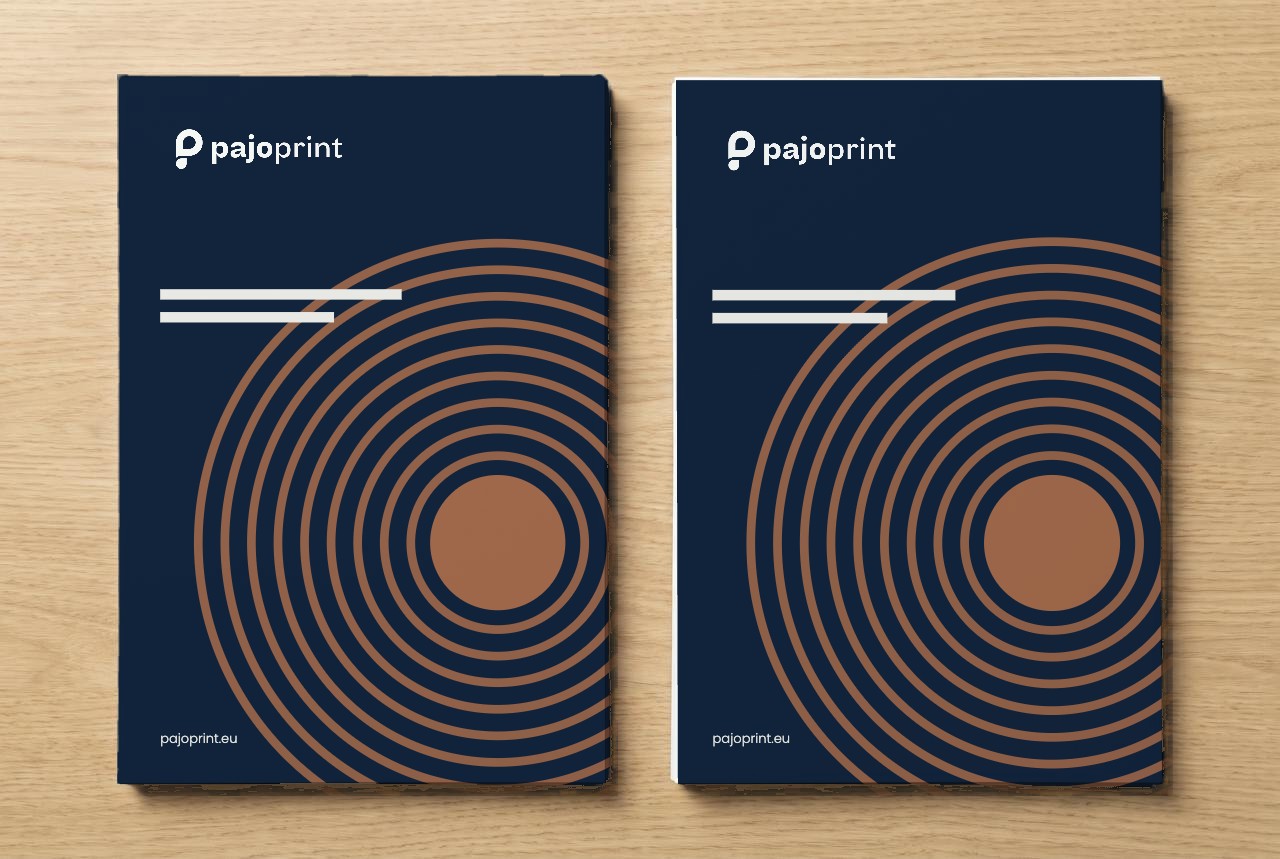
We print on a larger sheet and trim the piece to size at the end. The cut can shift by 0.5–2 mm. If the background ends exactly on the trim line, a white strip appears along the edge.
That is why the file has three boundaries:
- Bleed – 3 mm beyond the trim line. The background colour and edge-to-edge images extend into it. This part is cut off.
- Trim line – the finished size.
- Safe area – 3 mm inside the trim line. Text, logo and anything important stay within it.
Example: an A5 flyer is 148 × 210 mm. The file including bleed is 154 × 216 mm.
In InDesign and Illustrator, set the bleed in the document settings (Bleed 3 mm) and when saving the PDF choose Use Document Bleed Settings. Word and PowerPoint have no bleed setting: make the page 6 mm larger and keep text at least 6 mm from the edge.
Keep frames away from the edge
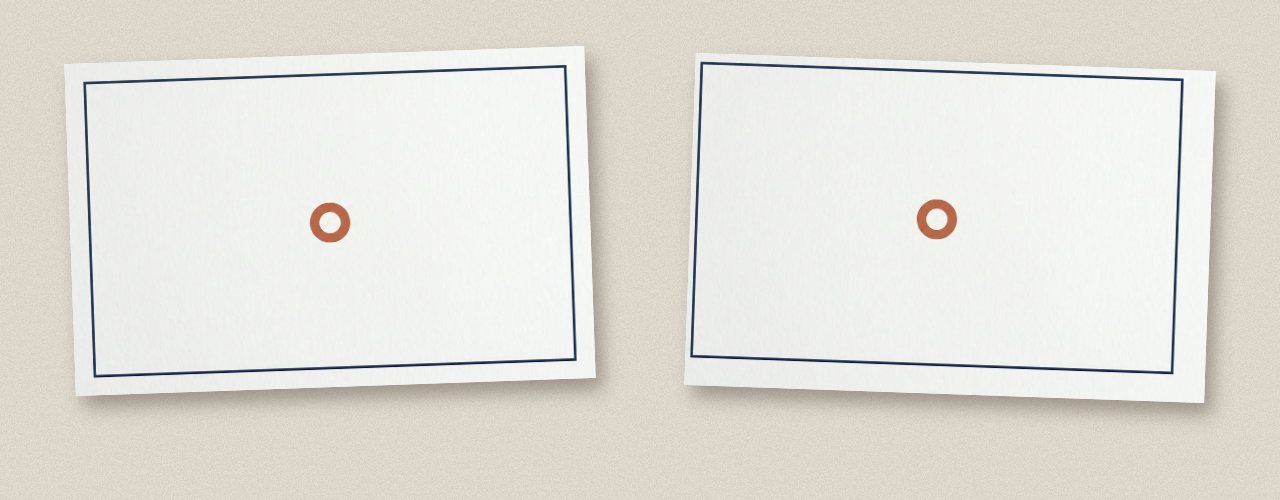
Because the cut can shift by 0.5–2 mm, avoid frames or lines that run parallel and close to the edge. Even the smallest shift makes the margin on one side wider than on the other, and it shows. If you need a frame, keep it at least 5 mm from the edge or extend the background and pattern into the bleed.
Colours, images and fonts
Colours. A screen mixes colour from light (RGB), a press from four inks (CMYK). Some bright screen tones, especially neon green, bright blue and orange, cannot be printed. Design in CMYK and the screen will already show a more realistic result. We convert RGB files ourselves, but the colour may then come out duller than expected.
Images. Print needs 300 dpi at the printed size. An image taken from the web is usually 72 dpi and looks blurry in print. To check: image width in pixels / 300 × 2.54 = maximum width in centimetres. A 2400 px wide image works up to 20 cm wide. A large poster is viewed from further away, so 150 dpi is enough there.
Fonts. Embed the fonts in the PDF or convert the text to outlines. Otherwise another computer replaces the font with its own and the line spacing shifts.
↑ Back to contentsPrint file from Canva
Canva can produce a proper print file if you set three things before you start designing and make a few choices when saving.
- Correct size. Create a design → Custom size, with millimetres as the unit. Enter the finished size, not the size including bleed.
- Show the bleed. File → Settings → Show print bleed. A dotted line appears around the page. Extend the background and edge-to-edge images to the page edge, past the dotted line.
- Text in the safe area. Keep text and logo at least 3 mm inside the dotted line.
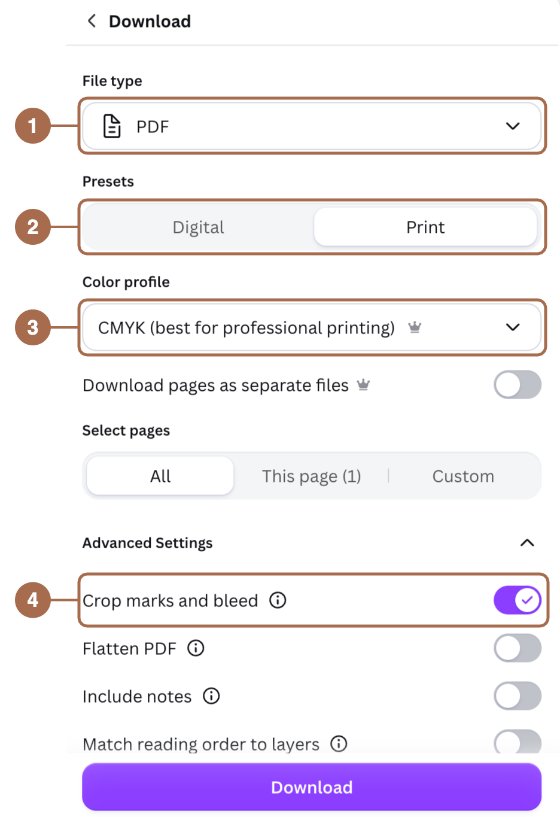
- Save. Share → Download. Choose PDF as the file type (1), Print as the preset (2) and, with Canva Pro, CMYK as the colour profile (3). Open Advanced Settings and turn on Crop marks and bleed (4).
PNG, JPG and a PDF with the Digital preset are not suitable for print. They are meant for screens and have no bleed.
↑ Back to contentsDesigning with AI
If you want to design a print piece with AI, we recommend using ChatGPT, Gemini or Claude only for a background image, an illustration or a design idea. For the best result, use Illustrator or another professional design program. An image from an AI image generator is not yet a print file:
- the image is RGB and usually 1024–2048 pixels wide, which gives 9–17 cm at 300 dpi;
- text often has errors, especially in accented letters;
- AI does not account for bleed and safe area.
A workflow that works has two parts. Let the AI create only the image, without text. Place the image in Canva or a design program and add the text and logo there.
Sample prompt for the image:
Create a background image for an A5 flyer. Size including 3 mm bleed: 154 × 216 mm, portrait, highest possible resolution. No text. Leave a calm area in the top third for the heading and keep important elements at least 10 mm from the edge. Style: [describe the style, colours and mood].
If the image is below 300 dpi at print size, enlarge it with an AI upscaler and check the result at 100% zoom.
A complete print file with AI
An image generator builds a picture from pixels, but a chatbot (ChatGPT, Claude, Gemini) can also write a vector file: SVG or PDF, where text is real text and sizes are in millimetres. This way a simple piece such as a flyer, invitation or label can be made directly with AI. The result depends on how precisely the requirements are written in the prompt.
- Put the size, bleed, safe area, colours and font in the prompt.
- Add the exact text that the AI must not change.
- Attach your logo file and ask for it to be used unchanged.
- Ask for the result as a vector PDF. If the AI gives you an SVG file, open it in Illustrator, Inkscape or Affinity and save it as PDF.
- Check the PDF at 100% zoom: size, accented letters, phone number, email, QR code.
Sample prompt for the whole file:
Create a print file for an A5 flyer as a vector PDF. Finished size 148 × 210 mm, page size including 3 mm bleed 154 × 216 mm. The background extends to the page edge. Text and logo at least 6 mm from the page edge. Text as live text, not as an image, font [font name]. Colours as CMYK values: main colour C0 M90 Y85 K0, text K100. Use this text exactly, unchanged: [paste text]. The logo is attached as a file; use it unchanged and do not redraw it.
What not to do with AI
- Don't let an image generator draw text into the picture – letters come out distorted and accented characters wrong.
- Don't let AI redraw your logo. Always use your original logo file.
- Don't save the print file as JPG, PNG or a screenshot.
- Don't enlarge a small image several times over and expect it to be sharp in print.
- Don't use well-known characters, trademarks or other people's photos – you need rights to use them.
- Always check numbers, addresses, dates and the QR code. AI can change them even when you asked it not to.
Binding in the file
Every binding has an area where text cannot go. Make the file as single pages in order, not as side-by-side spreads – we arrange the pages into spreads ourselves.
Page numbers
In an open publication, odd pages (1, 3, 5 …) are always on the right and even pages (2, 4, 6 …) on the left. To keep the number on the outer edge, it goes in the right corner on odd pages and in the left corner on even pages. In a design program, left and right master pages handle this. The same applies to margins: the inner margin on the binding side is on the left on odd pages and on the right on even pages.
Covers
You can put the cover in the content file or send it as a separate PDF. If the cover is in the content file, the order is:
- front cover (cover 1);
- inside front cover (cover 2);
- content pages;
- second-to-last page: inside back cover (cover 3);
- last page: back cover (cover 4).
If the inside covers are blank, add blank pages in their place. The file then has 4 pages more than the content, for example 32 content pages + cover = 36 pages. A perfect-bound cover is always a separate file because the spine is in the middle.
Spiral and comb binding
The pages are punched along the binding edge. Keep text, page numbers and logo at least 10 mm from the binding edge. The background can run over the edge; the holes simply cut through it. For a calendar bound at the top, rotate the back sides 180° so the text is the right way up when the page is flipped.
Perfect binding
A perfect-bound book does not open flat, and up to 1 mm is milled off the spine. Leave at least 15 mm of free space along the spine edge of the content pages. The cover is also glued to the book block next to the spine, so don't put anything important next to the spine on the inside cover or on the first and last content pages. The cover is a separate PDF: back cover, spine and front cover side by side.
Spine width = number of pages / 2 × paper thickness + about 0.5 mm for the cover. 200 pages on 100 g uncoated paper: 100 × 0.12 + 0.5 = 12.5 mm. Text can go on the spine if it is at least 5 mm wide. The thicknesses of our papers are listed in the FAQ; for other papers we send you the spine width before printing.
Saddle stitching
The page count must be divisible by four. In a thicker booklet the inner pages move towards the edge after trimming, so keep text at least 5 mm from the outer edge.
↑ Back to contentsFoil and debossing in the file
For foil and debossing we make a metal die. In the file you mark with a colour what will be foiled or pressed into the paper. That colour is not printed.
- On the same page: mark the foil or debossing with 100% magenta (C0 M100 Y0 K0) and don't use magenta anywhere else in the design.
- On a separate page: put only that element in 100% black (K) or 100% magenta (M), in exactly the same position as on the print page.
In both cases use vector graphics and text converted to outlines. For foil, lines must be at least 0.3 mm and text 7 pt; for debossing 0.35 mm and 8 pt. Keep foil 3 mm and debossing 5 mm inside the trim line. Both can shift up to 1 mm relative to the print, so don't place them exactly on a printed line.
Read more in the article Foil-stamped and debossed business cards.
↑ Back to contentsBefore sending: checklist
- PDF, preferably PDF/X-1a or PDF/X-4
- Page size = finished size + 3 mm bleed on each side
- Text and logo at least 3 mm inside the trim line, no frames near the edge
- Colours in CMYK
- Images 300 dpi at print size
- Fonts embedded or converted to outlines
- Single pages in the correct order
- Binding margin for bound items, correct spine width for perfect binding
- Foil or debossing marked in magenta or on a separate page
Help with your print file
We check every file before printing and let you know if anything needs changing. If you need help with the design or the print file, send us a request.
Send a request